Words: Ali Millar Pics: Glenn Wardle
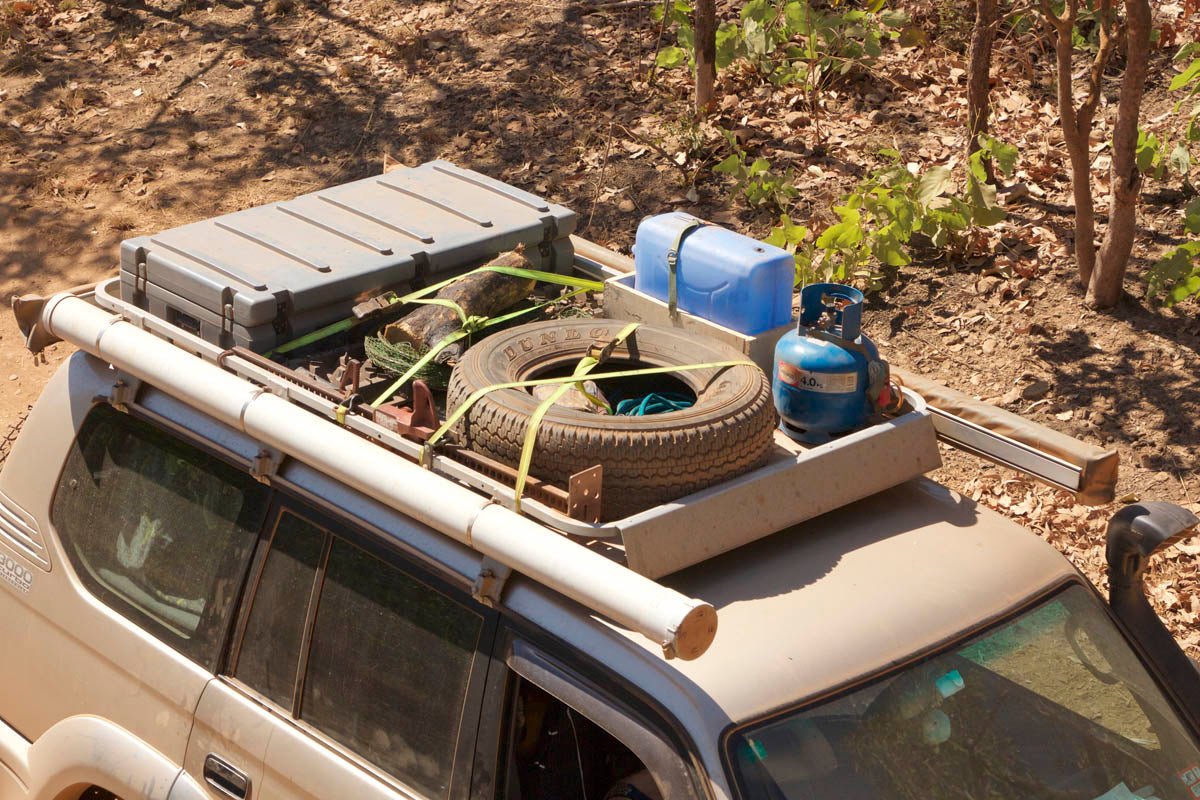
 (Image: We picked up our roof rack and toolbox secondhand for a bargain.)
Here are a few simple DIY projects to help cut costs on your touring machine.
When you’re working to a tight budget, setting up your 4WD for touring can be daunting – there’s a million and one pieces of gear touted as camping essentials and it’s easy to spend half your savings before you even leave the driveway. But one way you can save a buck is with a good old-fashioned DIY approach.
We bought our Toyota LandCruiser Prado 95 Series a couple of years ago, and prepping it for a big trip on a shoestring budget became an ongoing DIY project. We decided to leave the camper at home this time, so our 4WD is set up to be entirely self-sufficient.
Everyone’s needs are different, though, and how you set up your tourer will depend on the type of vehicle itself, as well as what you’re towing, the types of roads you’ll be travelling, how much storage space you require, and whether you’re running a car fridge or appliances that need power.
And while you can’t necessarily do it all yourself, there are some items that, with a bit of research and know-how, you can do on the cheap. DIY saves money on labour costs and also allows you to shop around and find the best prices on parts and accessories.
Of course, it goes without saying that you’ll need some basic mechanical and carpentry skills if you’re going to start pulling apart your car or building new fit-outs. But DIY projects are a great way to learn new skills and you’ll also get the satisfaction of seeing your own handiwork at play.
So to get you started on your own DIY adventure, here are some projects we tackled for our setup. Once you’ve worked out your needs, it’s time to get out the tools and save yourself some cash!
 (Image: Rear unit storage shelving - the unit extends from behind the drivers seat to rear.)
CUSTOMISED REAR DRAWERS AND SHELVING
There are numerous companies that can build you a quality rear drawer unit, but if you’re after a good DIY project for your touring rig, this can be a fun – yet still challenging – place to start.
It’s a great way to keep your gear in order and can be built to accommodate a car fridge. Designing it yourself allows you to fully customise, and there are heaps of different materials and layouts you could go with, so you can get your creative juices flowing!
We wanted to be able to sleep in the 4WD for easy overnighters, so we designed a rear drawer and shelving unit that takes up the entire rear area (removing all the back seats), with enough space to store all our gear within the unit and still allow for a mattress and sleeping space (albeit slightly cramped!) on top.
We used 12mm hardwood ply for strength, but kept weight down by building part of the shelving frame out of lightweight aluminium Connect-it (a square tubing with joiners) that allows you to construct the unit inside the vehicle. We installed a ready-made fridge slide, providing easy access to the chest fridge.
For a neat finish, we covered the unit with automotive carpet – this can be expensive, but we picked up a roll of off cuts for a bargain, so it pays to shop around.
DIY TIPS:
Before you design your unit, work out what you want to store in this space. If you’re fitting a fridge, the height of the unit and the size of the drawers will be dictated by this. You’ll also need to allow adequate ventilation.
Think about how you’ll get the unit into the car and how you’d remove it if you want to revert your car at the end of a trip. It may need to be built in sections to get it through the door – our unit is pretty big so we did it in three parts.
Drawer slides can be purchased in sets and at different weight capacities. Make sure you get heavy-duty slides to support the weight you’ll be carrying, particularly for larger drawers.
In the planning stages, work out how you’ll fix the unit to the vehicle. Bolting it down using existing anchor points avoids having to drill new holes. It’s also essential to get the unit totally flat so there’s no movement and it can’t bounce around on rough roads.
These units can add a fair bit of weight to the back of your car so consider your materials carefully, but make sure it’s strong enough to handle rough roads.
OUR COST: Under $1300 (costs will vary hugely depending on the size of the unit and materials you choose).
AUXILIARY BATTERY
If you have a fridge or any other 12V appliances in your car, you’ll want a second battery to keep things running at camp.
For this project, you’ll need some knowledge of 12V systems to ensure safe and correct installation, as well as a bit of know-how when it comes to running wiring through the vehicle interior. Safety is paramount when working with electricity, so take care.
We went with an 110Ah AGM battery built for under-bonnet installation and used an auxiliary battery wiring kit, which came with full instructions and included a voltage sensitive relay (to safely charge and isolate the two batteries, ensuring your car’s main battery isn’t drained by your appliances), as well as all wiring and connections.
We ran wiring to the rear and installed a 12V DC distribution panel, which includes a voltmeter to monitor battery charge. To charge our 230V AC appliances, such as laptop computer and camera batteries, we also fitted a 12V pure sine wave 350W inverter.
DIY TIPS:
Ensure your system is safe by choosing an appropriate battery for the job, as well as using the appropriate fuses and circuit breakers. Some batteries aren’t suitable for under-bonnet installation so, as with anything, do your research.
When choosing your battery, think about what appliances you’ll be running and what kind of charge they require, as well as how you will charge your battery at camp (eg., with a complementary solar system).
The distance between your car’s main battery and the auxiliary battery, as well as the distance between the auxiliary battery and appliances will impact charging efficiency. You’ll need to choose appropriate gauge wiring to ensure voltage drop is minimised.
OUR COST: Under $950 for all fixtures and fittings, including the pure sine wave inverter ($230), AGM battery ($350) and battery tray.
 (Image: Snorkels are a good addition for water crossings.)
SNORKEL
Installing a snorkel is a good idea if you’re planning on doing water crossings; however, cutting a hole in the side of your car can be nerve-racking and it’s certainly not something you want to get wrong! If you’re not confident, this is one to leave to the professionals. But if you’re fairly sure of your abilities, you can save on labour costs by installing your own.
You’ll need the right tools for the job, such as a drill with a hole saw attachment, step drill bit and an air saw, which will add to your costs if you don’t already have them.
You can buy snorkels in a kit specific to your vehicle’s make and model, which comes with a stencil for cutting and drilling the holes and everything else required to fit it.
While you’re at it, consider installing diff breathers to ensure your transfer case and gearbox don’t take in water on crossings. This is an easy DIY project with the parts available in a kit.
DIY TIPS:
Take it slowly – once you’ve cut a hole in the panel there’s no going back!
Make sure you get a good seal on all of the parts where they connect to the car’s air intake system so that it’s watertight.
OUR COST: $330 (costs will vary depending on your vehicle’s make and model).
SUSPENSION UPGRADE
Upgrading your suspension may be a good idea if you’re carrying or towing heavy loads. Consider the kind of roads you’ll be driving and the conditions your car can handle, as well as the weight it’ll be carrying. Costs of parts can vary hugely depending on the brand and quality, but this is something you don’t want failing out on the tracks.
We installed a heavy-duty coil spring suspension to accommodate the weight of our gear, as well as a 2in lift for additional body clearance.
Mechanical knowledge is essential for this project; if you’re not sure, don’t do it!
DIY TIPS:
Depending on the type of suspension you’re running and the tools you have available, you may need some parts pre-constructed by a professional. We bought pre-assembled coil-over struts for the front to simplify installation.
Be aware that changing the car’s height can affect its operation as well as balance. There are also restrictions around raising a vehicle’s height – make sure you do your research, and check with road authorities and your insurer before you undertake any work.
It’s essential to get your wheels aligned after installing new suspension, especially if you’re changing the ride height.
OUR COST: $1400 for heavy-duty coil springs and shocks (front and rear) with pre-assembled coil-over strut.
DIY QUICK TIPS
Know your abilities: If you’re not confident then don’t start pulling the car to pieces. You don’t want to have to pay someone else to put it back together!
Do your research: Talk to those in the know and read widely – there’s a stack of information online that can help you avoid problems before they hit.
Understand the pros and cons: While it can save you cash, DIY can void manufacturers’ warranties on parts and products if you aren’t a qualified professional. Check your vehicle insurance, too, and make sure it covers any work you do yourself.
Plan ahead and shop around: If you know what gear or parts you need in advance, you can keep an eye out for bargains.
Don’t compromise on quality: While bargains are great, buying cheap parts can mean a drop in quality and they may not last the distance – exactly what you don’t need!
Stay safe: Take all precautions to keep safe when working on the car. Ending up in the emergency room doesn’t bode well for a good trip.
Take your time: DIY projects will invariably take longer than you think, so allow plenty of time to do the work properly.