As consumers, there are so many recovery equipment options available to help get us out of trouble in the bush. While it is good to be prepared, we can’t always have everything. Some equipment is expensive or heavy or bulky or just not that critical for certain kinds of conditions.
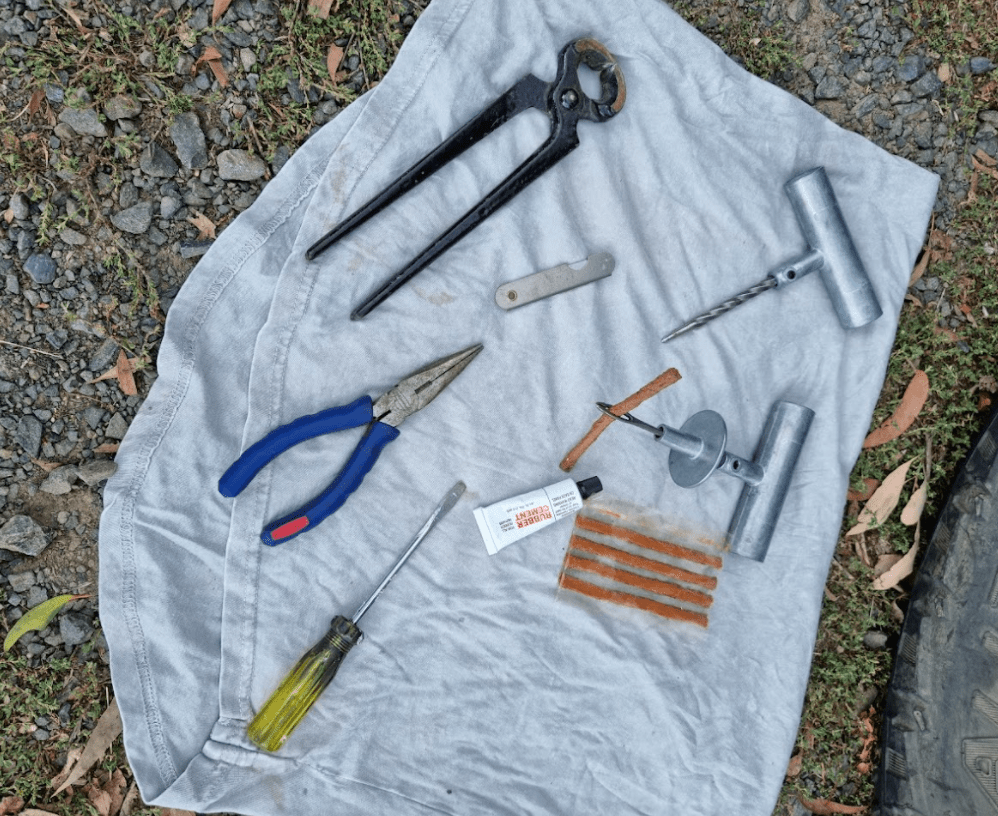
But here is an imperative piece of recovery equipment that will fit in your pocket, weighs about 200 grams and will cost you under $20. The humble tyre plug kit as the name suggests repairs holes in your tyres.
If you are new to this you might say I have a spare tyre or even two spare tyres, why do I need a plug kit? Here is an example, a few years ago my wife and son headed off on a cruisy day trip in the Vic High Country. They weren’t even 4WDing, just sightseeing on some gravel roads out the back of Licola. Fresh rock had just been put down on the roads and they were unlucky enough to catch a sharp edge that punctured two tyres in one go. With only one spare tyre on board and no plug kit, they were stuck waiting for help for five hours. If they had a plug kit, they could have repaired two tyres easily in under half an hour (or a lot quicker with practice) and been on their way. Admittedly, you usually need an air compressor as well. That’s another story, but no 4WD tourer should be without a compressor.
Find the Leak
Your tyre can be damaged in a number of ways – sometimes the leak is obvious, sometimes it requires a bit more investigation. Be aware the damage could be on the tread of the tyre or the side wall. Here’s a big time saver; you don’t necessarily have to remove the wheel to identify or repair the leak. You may be able to drive the car very slowly to expose different parts of the tyre until you find the problem. Alternatively, you may be able to jack the car up just enough to enable the wheel to be rotated. Once you have identified the leak point you can let the car down off the jack. (All the normal safety precautions of jacking a car need to be followed but it is ultimately safer if the wheel does not need to be removed.)
Sometimes you can see an object stuck in the tyre and if you haven’t lost all the air yet, you may hear the tyre hissing. If you have a stuck object, you can pull it out with a pair of pliers or similar. If the object is acting as a plug, you will then get a rush of air out of the tyre. (If you are organised to prepare and plug the hole you may be able to complete the job without losing too much air. In fact, pushing the insertion tool in is easier with pressure in the tyres because the tyre doesn’t deflect as much. And pulling out the insertion tool while leaving the plug in is easier because the pressure holds the plug.)
Sometimes there is no object stuck in the tyre, but you can hear the hissing, or a puncture/tear is visible. Sometimes you just can’t find any evidence at all. This could happen, say when you get up in the morning and find your tyre very low or completely flat. In this case, you may have a slow leak. To find the leak, pump the tyre back up again and progressively spray areas of the tyre with soapy water. You may need to look carefully but usually you will be able to spot bubbles forming where air is leaking from the tyre.
Prepare the Hole
Use the reaming tool to “clean” the hole. What you are doing is pushing any debris out of the hole and ensuring that the hole is big enough to accept the insertion tool/plug. It can require a bit of conviction to push hard through the tough rubber and steel belt of the tyre. Just lean into it and give the tool a few twists - you won’t hurt the tyre.
Plug the Hole
Thread the plug through the eye of the insertion tool. Apply rubber adhesive to the plug. (Some are of the opinion that the adhesive is unnecessary, but I found it lubricates the plug making it easier to push it in.) Push the insertion tool into the hole in the tyre until there is only a couple of centimetres of plug left sticking out. Pull the insertion tool out quickly with a bit of a twist and the plug will be left in the hole. Then, trim off the plug protruding from the tyre. There is no need to wait for the adhesive to dry. Inflate the tyre and check if your repair is leaking.
Sometimes it takes more than one plug to fix a whole – you can jam them in side-by-side. Also, you may have more than hole in the tyre, so keep an eye out for that.
Have a go
You don’t always get a chance to easily practise something like this but here’s a few ideas. If you are out in a group and someone else gets a flat, don’t be shy – ask if you can do it. You can’t really muck it up that badly. If it doesn’t work the first time, you can always chuck another plug in. When your tyres are worn, and you are ready to replace them, have some fun first. You can inflict a puncture in one of your unsuspecting tyres and then repair it. I reckon a cordless drill and a screw sounds like a good way to do it. Just deflate the tyre first to take away any chance of all that compressed air creating a projectile. (Based on the temporary fix information below, you shouldn’t use your “experimental tyre” to drive to the tyre shop.) I took the photos for this with an old tyre off the rim. I can tell you it is much harder as the tyre flexes too much to push in and pull out the insertion tool. If it turns out your first chance to try a fix is with a real flat out in the bush, just have a go. You’ve got nothing to lose – you’ve already got a flat tyre!
Temporary Fix
A quick search on the Vic Roads site (yes, it is only one state) turned up reference to Vehicle Standards Information 16 - Tyre maintenance and repair. Here are some extracts from it.
“Repair of punctures in tubeless tyres by insertion of plugs or loops of adhesive, or sealant impregnated cord, without removing the tyre from the rim is not a satisfactory procedure. This method is acceptable only as an emergency repair in exceptional circumstances to enable the vehicle to be driven to a service centre, where proper repairs can be made.”
“Repairs are only allowed in the crown area of the tyre. Repairs are not permitted in the bead, sidewall or shoulder area of the tyre.”
IF IN DOUBT, CONSULT A PROFESSIONAL
Improper repairs could lead to injury, death or property damage. Repairs of this nature should only be undertaken by persons with suitable mechanical competence. Information provided is general in nature, not comprehensive and can only be taken as a guide. Individual discretion must be exercised and persons undertaking described tasks do so completely at their own risk. Publishers and creators of this content accept no responsibility for loss or damage.