How to use the Hema Explorer Cloud
Record your adventures and bring them back with you using the Hema Explorer app, then share them online from your own Hema Explorer Cloud account.
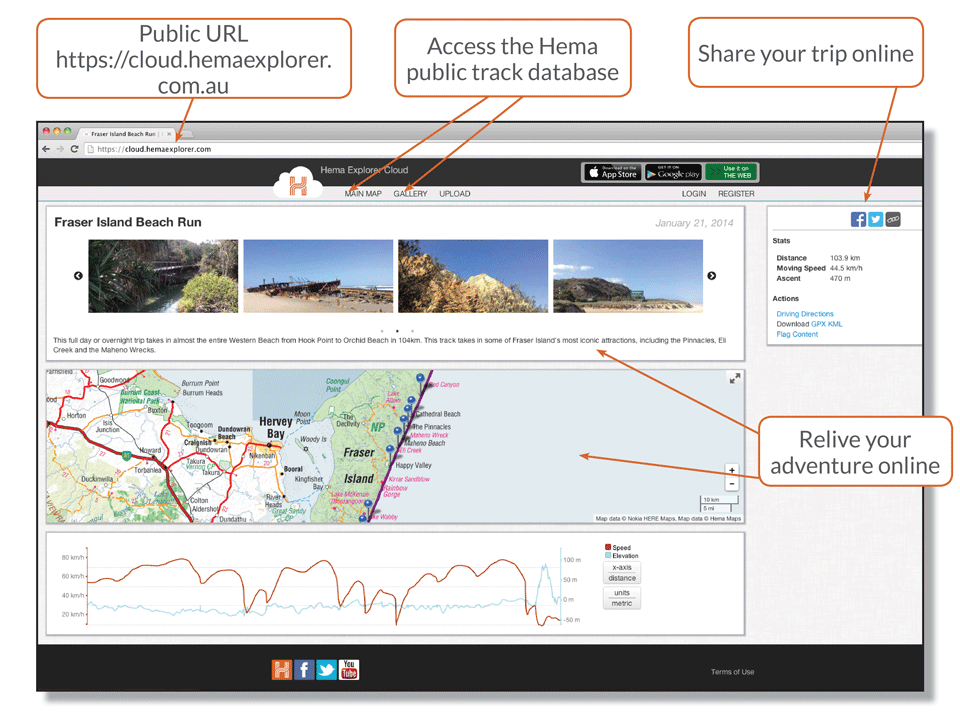 Learn how to use the Hema Explorer Cloud
- What does it do?
- Creating an account
- Navigating the Hema Explorer Cloud website
- Recording your trip
- Syncing trip data
- Adding text to waypoints, photos and tracks
- Trimming your track recording
- Sharing your trips
- Downloading other people's tracks
- Rules for sharing trip profiles
Visit the Hema Explorer Cloud Browse Hema's public tracks Learn more about the Hema Explorer app
What does it do?
The Hema Explorer Cloud is an online public track database powered by Hema Explorer app users. Hema Explorer users can store and view their recorded waypoints, photos and track recordings on a free Hema Explorer Cloud account, then share them online as visually integrated trip profiles either socially or to the Hema Explorer Cloud’s public database. The Hema Explorer Cloud website is freely accessible to non-app users.
Creating an account
When you open the Hema Explorer app for the first time, the app asks you to create a Hema Explorer Cloud account (it’s recommended to make an account at this point). However, if you didn’t create an account at the time it’s easy to make one later:
From the Hema Explorer map screen on your device, open the Side Panel and tap on Settings (or you can create an account on the Hema Explorer Cloud website). On Android devices tap Account and on iOS devices tap Last Sync (under Cloud Sync), then enter your details to create your account.
Once you’ve created an account, you are ready to store and share your adventures online and import public tracks to your device.
A Hema Explorer Cloud account lets you safely store all your track recordings, waypoints, geo-tagged photos and notes all in one place which you can access online.
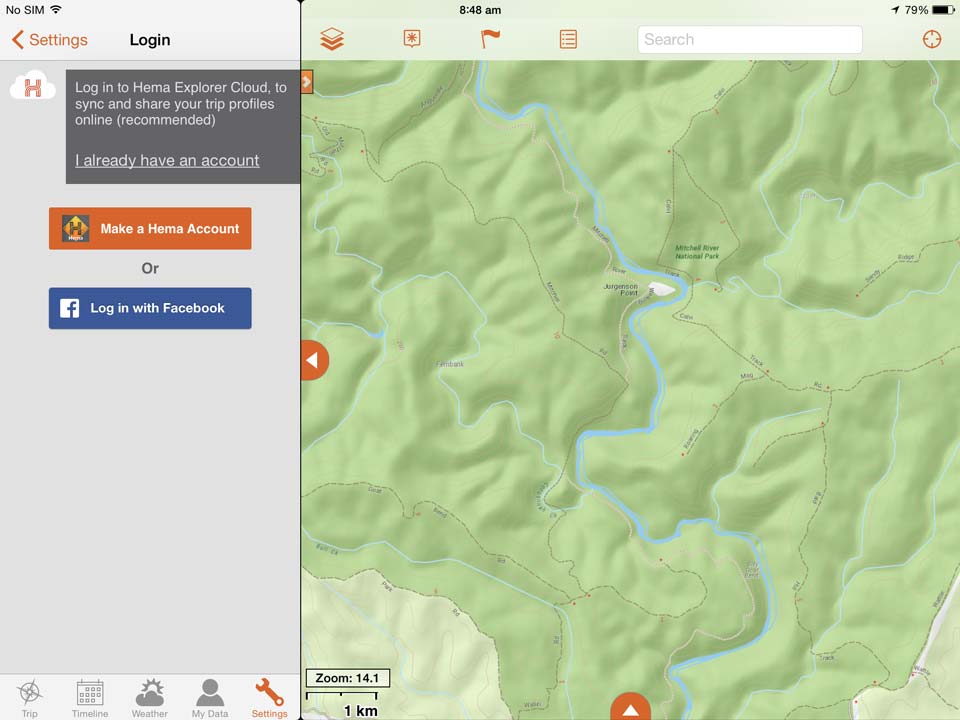 Open the Side Panel and tap on Settings to create a Hema Explorer Cloud account.
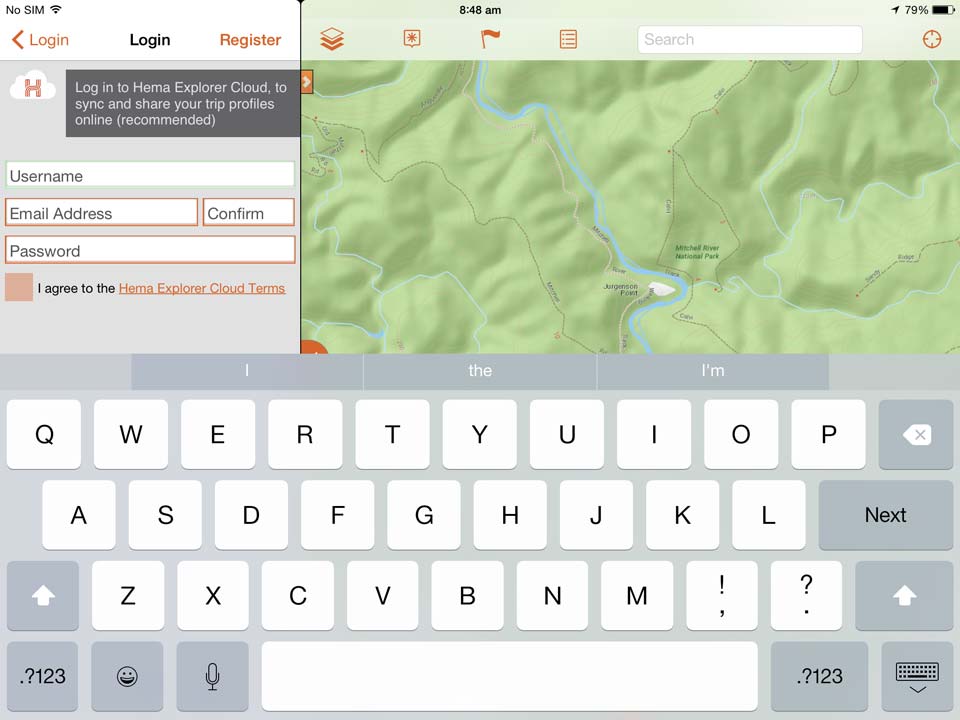 Enter your details and agree to the Hema Explorer Cloud terms to finish the account creation process.
Navigating the Hema Explorer Cloud website
The Hema Explorer Cloud website consists of the public track database and your private account. Public features, including the public track database, can be accessed without signing into an account:
The Gallery
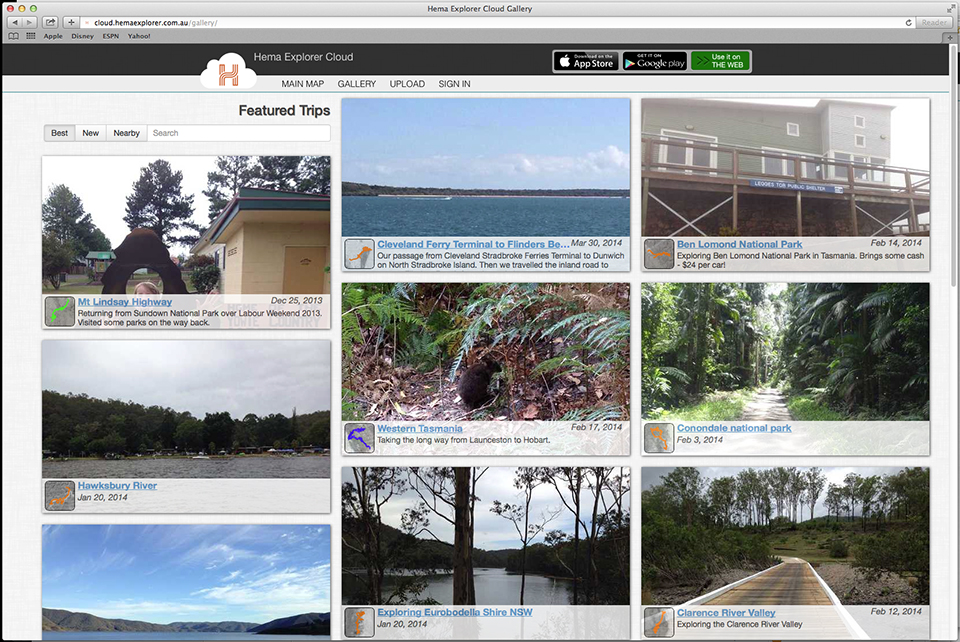
The Hema Explorer Cloud Gallery represents the Hema public track database in a listed order, and is where you arrive when you first enter the Cloud. Here you have the option to sort public tracks as Featured, New or Nearby.
Each individual trip profile is presented with a featured photo (if a photo was taken while recording the track) or an overview of the track recording, the title of the track and the track summary, giving you a snapshot of each trip.
 Main Map
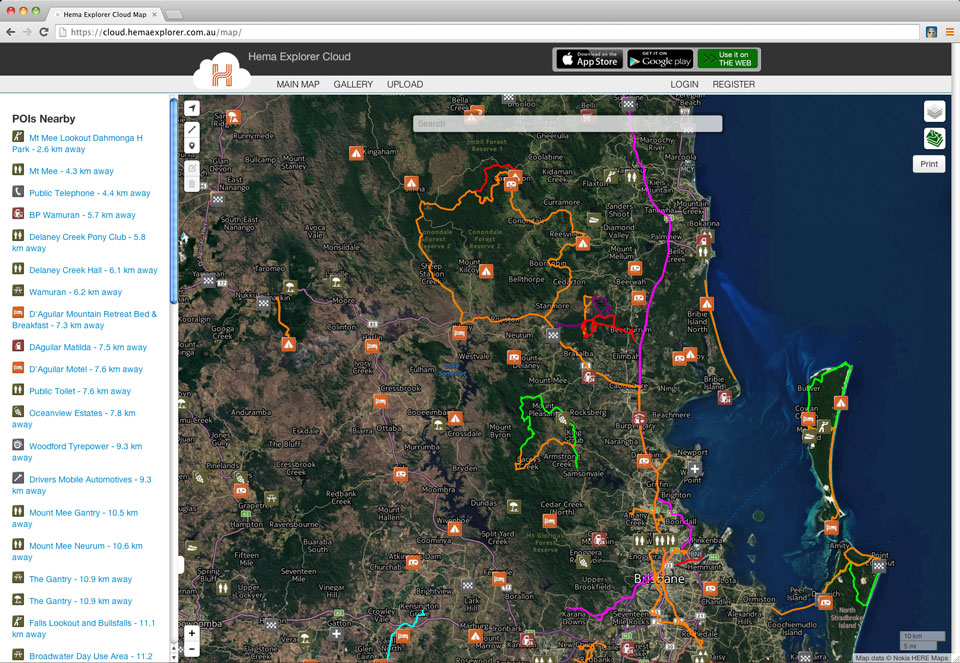
The Main Map displays the Hema public track database on an interactive map of Australia. Find tracks near you to explore or browse through tracks, photos and waypoints in other areas of Australia.
Discover what’s around with 40,000 point of interest (POI) symbols, which are sorted by distance and relate to what location is displayed on the Main Map. The POI on the Main Map are named and marked with touring symbols, though more detailed information for each POI including individual facilities, activities and contact details can be accessed on a mobile device with the Hema Explorer app.
 Your private account
Once you sign in to the Hema Explorer Cloud using your email and password, click on your email address in the top right-hand corner to access the My Data drop-down menu. From here you can navigate to your tracks, routes, waypoints and the parameters of your cached maps (satellite, terrain or street maps you’ve clipped and saved to use offline). My Data is where you go to view, edit or delete any of your recorded trip data, as well as making trips public to add them to the public track database.
Sign in to your Hema Explorer Cloud account before browsing the Gallery or Main Map, then you can quickly and easily sync any public tracks that you want to use for your own adventures to your personal Cloud account.
Recording your trip
To find out more about creating a trip profile, read our article about how to record your trip with Hema Explorer.
Syncing your data with Hema Explorer Cloud
The Hema Explorer app syncs new data from your recorded adventures to your Hema Explorer Cloud account when it has internet access. This includes track recordings, waypoints and geo-tagged photos, as well as the notes and information that accompany them.
You can manually prompt Hema Explorer to sync your data by opening the Side Panel, entering Settings and tapping on Last Sync, which can be found under the heading Cloud Sync on iOS or Android devices. You can also turn automatic syncing on and off here.
 Hema Explorer groups your track recordings with the waypoints and photos that accompany them automatically, keeping your adventures completely intact when they are synced from your device to the Hema Explorer Cloud.
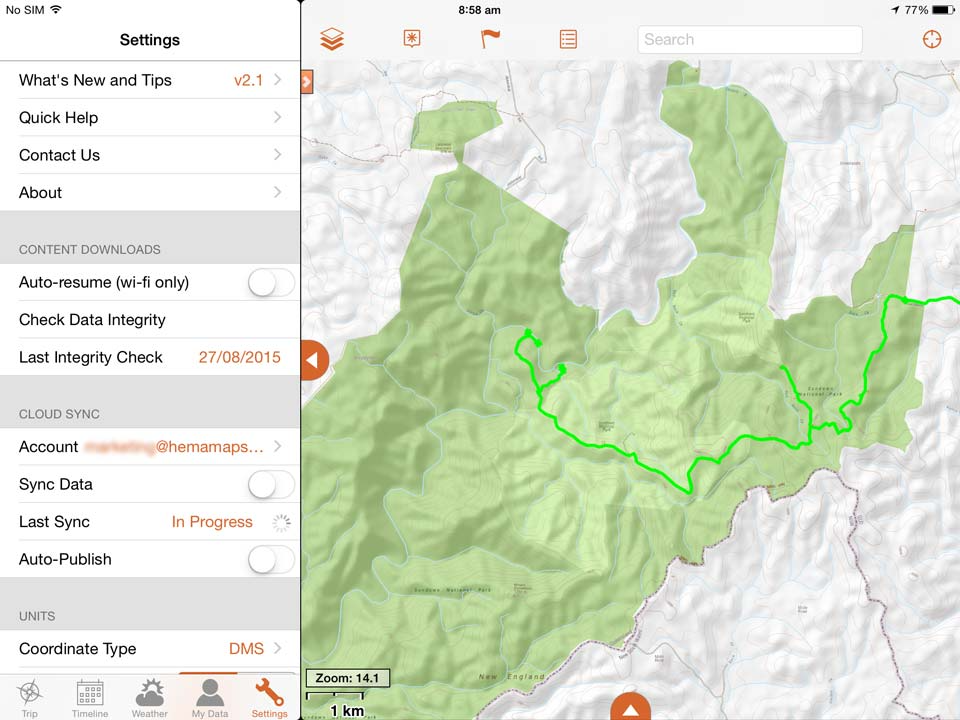
To manually sync your data to your Hema Explorer Cloud account, go to Settings and tap Last Sync to initiate a new sync.
Adding text and titles to waypoints, photos and tracks
You can add notes and a title to all waypoints, photos and track recordings you gather using the Hema Explorer app, which you can edit in-app on your device or from your Hema Explorer Cloud account online once you have uploaded your trip.
 Give geo-tagged photos and waypoints a title and more detailed notes to tell people where you went and what made it interesting, and summarise your adventure with track notes to fill in the details that your recorded data doesn’t cover.
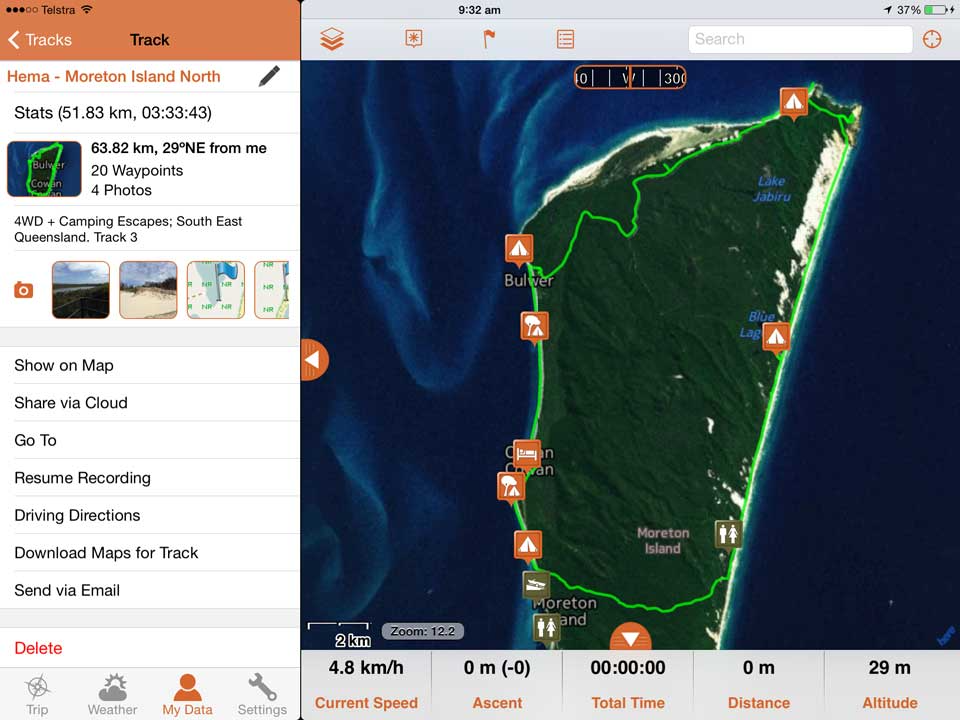
On your device, find the Track or Waypoint you want to edit to add titles and notes.
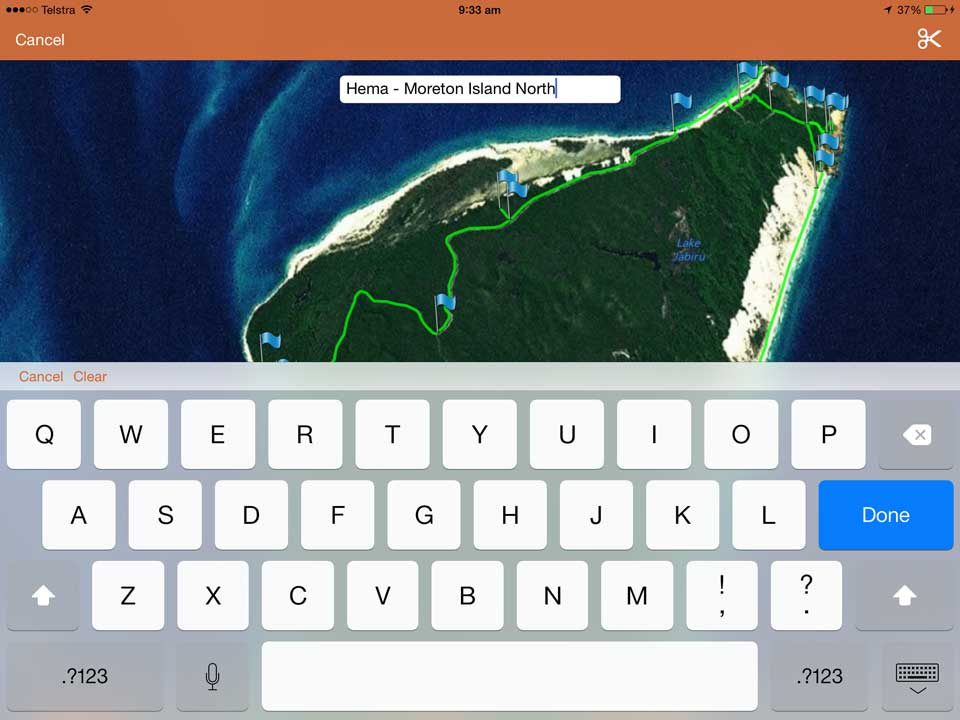
Renaming the title of a track.
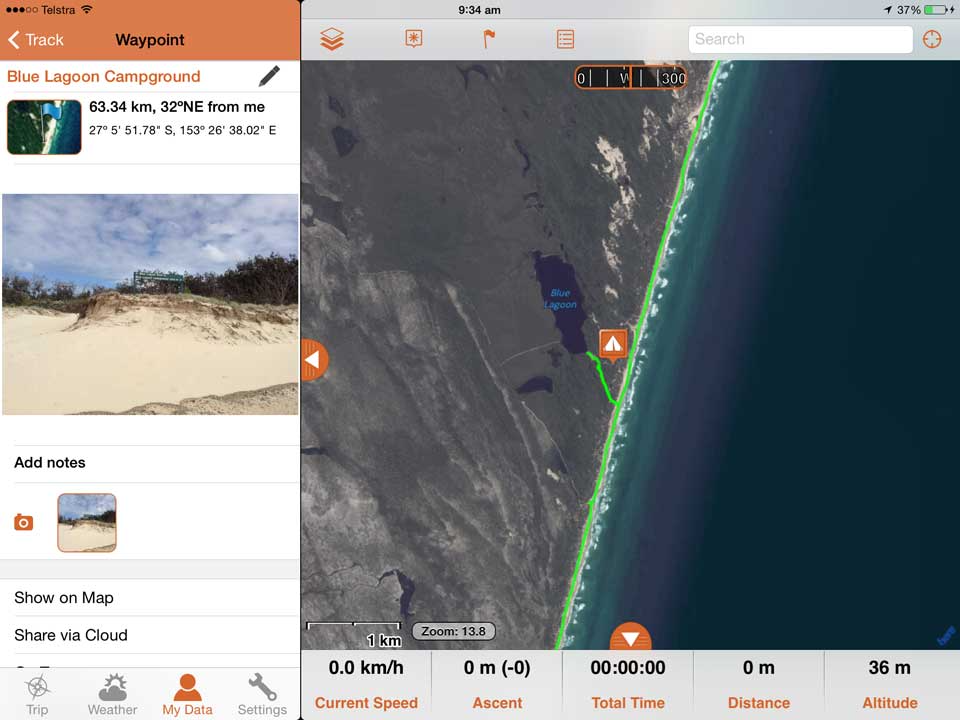
It's easy to add notes to any waypoints, photos or tracks on your device or on your Hema Explorer Cloud account online.
Trimming your track recording
It is possible to trim your tracks in-app to delete sections you don’t want attached to your track recording. Note however, that it’s only possible to trim off sections from the start and end of the track; it’s not possible to select a specific section in the middle.
To trim a track on iOS, simply find it by opening the Side Panel within the Hema fter tapping the track you want to trim, tap the Pencil icon next to the title of the track (which is also used for editing a track’s name) and adjust the sliders at the start and the end of the track to the desired positions; finish by tapping the Scissor Icon.
To trim a track on Android, find your track through the Side Panel under Tracks, then select the track you want to trim. Then tap Edit, adjust the sliders at the start and end of the track to the desired positions, then finish by tapping Save.
 Started recording too early or left a track log recording all the way home? Delete useless sections of your track by trimming them off the start and end.
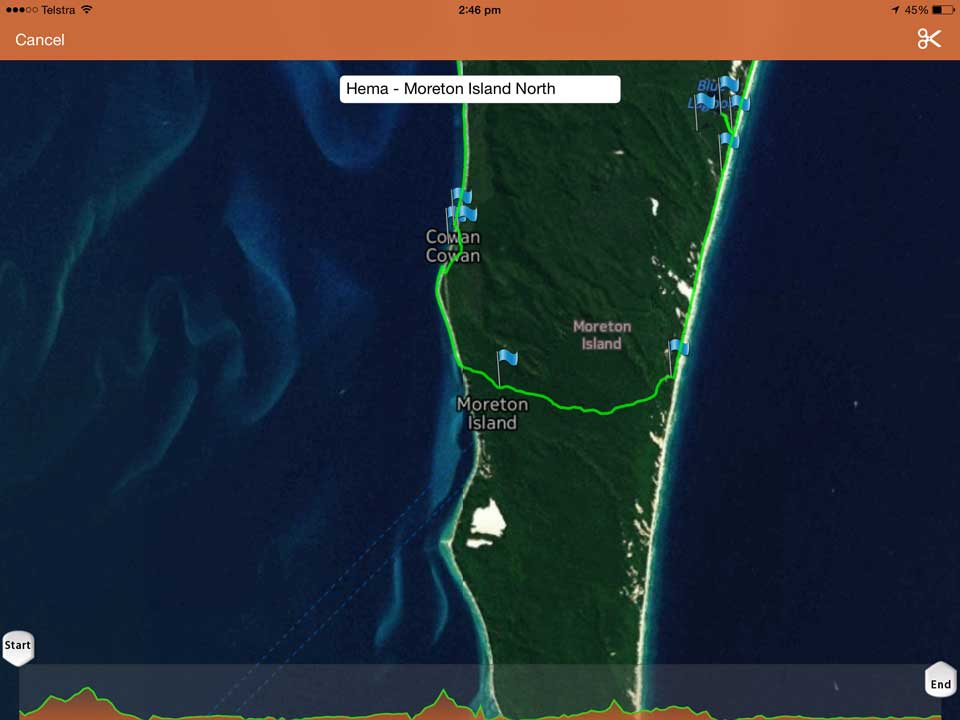
An unedited track with the start and end in their original positions.
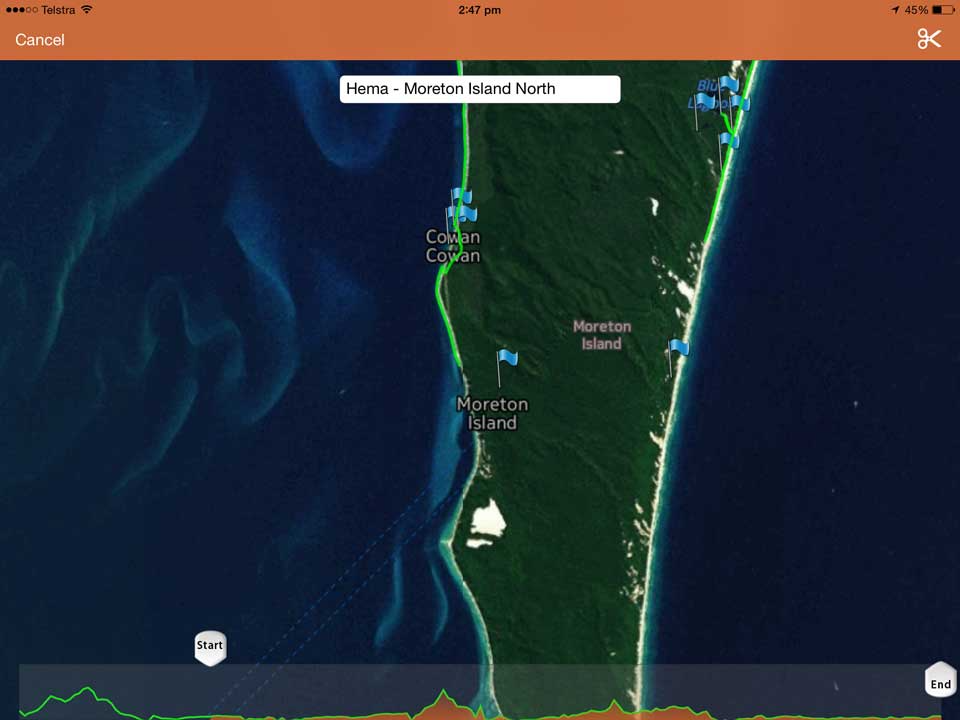
An edited track where the starting point of the track recording has been moved forward.
Sharing your trips
Once you have synced your trip from your device to the Hema Explorer Cloud, you can quickly and easily share it to Facebook and Twitter or simply as a URL via email.
After uploading your trip to the Cloud, you can share it with the Hema Explorer community by clicking on the Link icon and selecting ‘Make this trip public’ from your desktop or laptop. This adds it to the Hema public track database for other Hema Explorer users to view and download for their own adventures.
 Had a great time on the adventure you just recorded? Add it to the Hema Explorer Trip Gallery public track database so other explorers can download your track and follow in your tread marks.
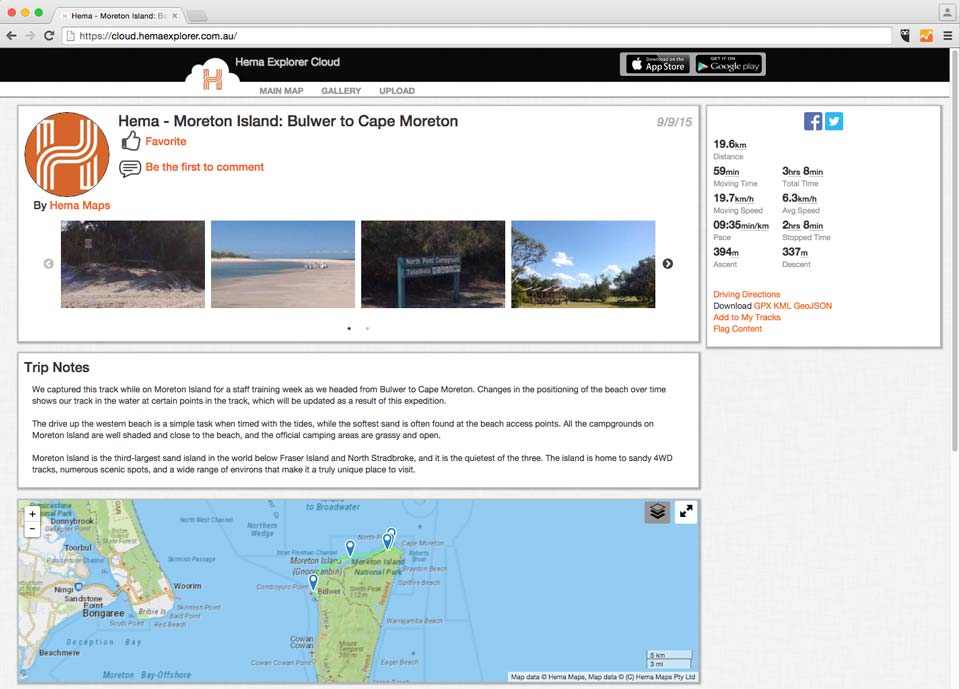
Tap the Link icon to get your trip's unique URL, or share it to Facebook or Twitter directly.
Downloading other people’s tracks to your device
You can download from the public track database of other Hema Explorer app users by visiting the Hema Explorer Cloud Gallery or the Hema Explorer Cloud Main Map. Featuring all the trips that have been nominated as Public by the people who recorded them, the Gallery and Main Map are the perfect places to find a track for your next adventure.
Download the trip profile you want to follow by clicking on it, then selecting Add to My Tracks from the Actions menu.
After selecting Add to My Tracks, the designated trip profile will appear under Tracks on your Hema Explorer Cloud account. The next time you open Hema Explorer on your device with an Internet connection, the track recording, waypoints and photos of the trip profile wilvice, ready to use.
Any trip profiles you sync to your device from the Gallery will appear under Tracks in the app, which can be found within My Data after opening the Side Panel.
 Don’t forget to check in on the Gallery every now and then to see if there are any new trips for you to download and use to navigate your next adventure.

Click Add to My Tracks under the sharing links and statistics to copy the selected trip profile to your own Hema Explorer Cloud account.
Visit the Hema Explorer Cloud Browse Hema's public tracks Learn more about the Hema Explorer app


0 comments